Showing posts with label Organisation. Show all posts

Sunday, 24 February 2013

A Scrapbook Station

One problem area of our house is my craft storage or the lack of it! Hence when I saw that Target had a great sale on a 4x3 cubed units and material cube draws I just had to have one. I jumped on line to purchase as something of this size was going to be far to heavy and difficult for me to pick up in store. So I got on line with the thought of getting it delivered until hubby kindly offered to save us the $50 delivery fee by going and picking it up for me. Great! So I purchased everything I needed, opted for the click and collect option and paid for it all. Once our order was at our local store I received an email notification. I forwarded this to Hubby who then went and picked up my goods with no fuss at all. Wonderful! I was super excited!! Finally I had the tools to tackle the impractical wardrobe full of scrap booking mess.


The very next day I opened up the flat pack, super keen to get stuck in to building our 4x3 cube unit. Hubby had offered to construct it once home that night but the impatient me wanted it done NOW! So it was up to me to do it. Considering I had never even placed a hand on a drill before I had no idea what I was getting my self in for..lol

 
Nevertheless, as much as I am impatient I am very determined also. My goal was to have it done before hubby could come home and takeover. I ensured I read all the instructions before I started including the manual for the drill.. you may laugh but as it was hubby's brand new cordless drill there was no way I wanted to break that! Anyway, I succeeded! Yes it did take me all day but then I do have two lovely children I have to take care of also. I was so proud that I had done it poor hubby was barely in the door when I dragged him into the study to see my accomplishment.
 
 
Once the constructing was complete it was time for the fun part... to decorate it! I first added 3 pink and 3 grey material cube boxes as draws but it needed something more. It needed something to add character to it, so I decided to add a pattern backdrop to some of the open cubes. I fiddled with wall paper, scrap booking paper and gift wrap that I had on hand. A piece of grey scrap booking paper looked great in one cube but I needed something pink for the other 2 cubes I wanted to back. Eventually I decided that I really wanted pink polka dots (yes I'm slightly obsessed with polka dots!) but the only 'paper' that I had that meat this requirement was napkins. So out came the napkins and with a bit of double sided tape they were perfect! (hubby once again thought I was crazy.. an occurrence that is becoming more often)
 
 
I emptied the wardrobe and placed my new scrap booking station inside and I love it!
 
 
Now the big task of putting all my scrap booking supplies into there new homes begins. Stay tuned for an update. Once everything is in its home I'll share it with you.
 
Untill next time take care, smile and be happy
 
YKylie
 

Friday, 5 October 2012

What should go where in our fridges?

 
So we have all seen the very impressive fridge storage and organisation floating around. I myself am happy with how my fridge storage looks, however I’m always wondering if we are correctly storing our food. What should go where in our fridges??
 

So today I decided to educate myself with the help of pinterest and thought I’d share with you what I learnt.
Here is what I found:


  I learnt that:

1.         Dairy products such as milk, cream, yogurt and other dairy products are best stored on the upper shelves of the refrigerator where the temperature is the most constant, so they'll keep longer.


Fail #1: I’ve always stored my milk on the fridge door!
Will have to see if I can rectify this in my small fridge

2.         Eggs are happiest in their cartons on a shelf.

Nooo.. One feature I love the most in our refrigerator is the egg storage compartment that urge you to put your eggs on the inside of the door. Guess that’s fail #2, I’ll have to stay strong and not give in -- the door is the warmest part of the refrigerator so the eggs are on the move!
 
 
Eggs in the door! Fail #2 sham on me!

3.         Cheese should be wrapped in cheese paper for storage, but waxed paper or parchment paper will also do the trick. Before storing, scrape the surface with a non-serrated knife to remove any excess oil that may have “sweat out” at room temperature. Each cheese should be wrapped separately and marked with the name and date of purchase. Avoid plastic wrap at all costs as the cheese can absorb the flavors and chemicals from the plastic.
 

Fail #3 Wow I’m really not doing well here! I always pop our cheese straight into a Tupperware container and store it at the top of our fridge. Next time I’ll know what to do!
 

4.         Mushrooms you buy at the grocery store are best left in their original packaging. Once you open it, wrap the whole package in plastic wrap. Wild mushrooms are best kept in a paper bag in your refrigerator’s crisper drawer.


5.         Never store fruit & veg together as ethylene-producing fruits are sure to make vegetables decompose prematurely. All vegetables are best stored in perforated plastic bags in your refrigerator’s crisper drawer. Fruit, with the exception of melons, citrus, and bananas, should be stored in the refrigerator in a separate drawer from the vegetables. Do not wash your fruit until you are ready to eat it; the excess water quickens decomposition.
 
Good news I use to throw them all in together in my crisper draw
however after getting my Fridgesmart Tupperware containers
I can happily say I’m no longer an offender.

Fruit and veg now get their very own container in accordance to the air that they require. 
Who knew fruit and veg breath?
(Find out more info here)

6          Meat is best stored in the bottom of the refrigerator where it is coldest. Removing the retail packaging and re wrapping the meat in foil can extend its shelf life, but you should try to consume refrigerated meat within 4 days of purchase.


I've removed our crisper draw in order to
store raw meat in the bottom of our fridge.
OK I knew this one but thought I’d share the info anyway. Raw meat should be stored at the bottom of the fridge to also prevent drips from contaminating food below.

So there we have it. Hopefully you learnt something new just as I did. I’ll still live by the basic rule of 'when in doubt, throw it out' however with this information hopefully I can now confidently stock the fridge, reduce our waste and saving us money by know what should go where in our fridge.

 
YKylie
 

Sunday, 30 September 2012

Home Organising System 1 - grocery plan


Well it’s the first day of October and whilst it might just be the start of another month, for this household it means the start of a few new home organisation systems that were going to start.

There are 4 main systems that I’ll be putting into practice : A new grocery shopping plan, a toy box-a-day system, a laundry schedule and a cleaning schedule.

I’ll share with you in detail over the next couple of days the systems were putting into practice in order to have a cleaner more practical home. At the end of the month I’ll let you know the result, what worked what needed tweaking and if I’ve scraped any.

First up A new grocery shopping  plan

As our local farmers market occurs each Monday so it makes sense for me to meal plan and head out to grab the fresh local fruit and veg that are better priced than what you find in the grocery store.

 
I’ll then head to our local butcher then finish up at Safeway to grab anything else. It makes for a long trip with two kids to lug around however I’m sure it will be worth it. Nothing beats fresh local fruit and veg!

Once home I then prep all our food taking the time to go through the fruit and vegies and pre-wash and chop any that I can before put them away.

colourbox.com
 
Pre-cutting all our veg then placing it into my Tupperware containers makes should make it easier each night at dinner rush time. I like the idea of just being able to go to the fridge and grab out any that you need to use with dinner!!!

 
I’m hoping this system will saves us a lot of time and money. Hopefully by having it pre-cut I’ll be more likely to use it all up and thus the amount that I throw away will decrease.

 Less waste = saved $$

Do you precut your fruit and vegie? How has it worked out for you?

Would love to hear you tips or ideas on making dinner time easier so please feel free to share

 
YKylie


Tuesday, 26 June 2012

Kitchen Junk Draw

As most of you would know I've been struggling with sciatica pain and have been restricted to the in laws couch for the past two weeks. I'm not some one to stop, sit on the couch and do nothing so as you can imagine the past two weeks have driven me insane to say the least. No the less it has made me learn a lesson and I now realise that as bub's #2 fast approaches I do need to take it easy. So to ease back in and feed my craving for organising (call it nesting if you like) I decided it was time to do a small job like the kitchen junk draw.

Before: Kitchen 'junk' draw

I'm sure many of us have that 'junk' draw located in the bottom draw of the kitchen however I wanted it gone. It's always been a draw that I keep telling myself I will get to another day so today was that day.

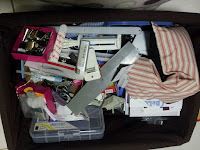
I pulled everything out and put it all into a basket so I could comfortably sit on the couch and go through it. With the help of a few tupperware containers I sorted through all the stuff. I was then able to place all the random batteries, pegs and appliance paperwork etc.. into the correct homes.

Everything out into basket

I had decided that I would need a solution to stop this 'junk' draw from occurring and so I've decided to now keep my aprons, oven mitts and tea towels in the draw instead. It only makes sense to keep them here instead of in the linen cupboard as they are then quickly on hand when needed. So I neatly folded all my tea towels (wow I have a lot) and then placed them in the draw at the front. To the back left we have my two aprons with my new Donna Hay tea towels I'm yet to open. To the right I have our oven mitts. Awww... how nice :0) he he he

After: Kitchen 'tea towel' draw

Have you got a small quick organisation task like a kitchen 'junk' draw that you have been saying one day to? Perhaps today is the day to get it done!


YKylie

Sunday, 3 June 2012

En suit Organised

I was having one of those days were I was doing a lot but not achieving much... you know the days where you run around the house all day but it looks like you have done nothing! I hate those sort of days and so when I put our boy down for his afternoon sleep I decided to organise our en suit. It would be a good task for me to quickly achieve and then I would visually be able to see something that I had achieved for the day. Now I don't know about you but if I can see I've achieved something I feel a lot better and don't get in a tizzy. Its has a somewhat calming effect for me.. I know silly but that's how it is and so our en suit was the task as hand...

Our en suit cupboard consisting of our mess shoved in

Firstly I pulled everything out. For some reason when I start these re organisation projects I'm always so surprised at how much stuff I pull out of spaces. Perhaps it is the fact that everything is out all at once and therefor makes me realise that we really do have to much stuff!

I created a bigger mess!

Armed with a few storage baskets and boxes I set to the task of grouping everything into categories then placing them into the cupboard.


On the top shelf we have...
1. My toiletries - in striped fabric basket from The Reject Shop
2. Tools such a nail clippers, tweezers, nail files etc.. - in mini wooden draws I already had
3. Hubby's toiletries - in striped fabric basket from The Reject Shop


On the bottom shelf we have...
4. Samples - into a lovely flowered pattered box I had been given a present in
5. Soap & Body wash - in white plastic basket from Kmart
6. Toothpaste - in small white plastic basket from Kmart
7. Supplies: Extra bottles or cans of Shampoo/Conditioner, Hairspray and Deodorant.


Now I did contemplate throwing away all the sample bottles that I have collected however I just can not part with them just yet.. they are so cute and I would love to place them out on fresh towels for any future guests we may be lucky enough to have stay with us. So for now they stay!

In regards to all that toothpaste.. Well what can I say it was on special and to buy in bulk always saves money hence were not going to run out of toothpaste for some time!

I also make it a rule to have one spare of the necessities such as shampoo, conditioner, hairspray and deodorant in the cupboard so as we are never out. As soon we use something we replace it with the stock supplies and it gets written on the shopping list to buy again. This works well for us and has eliminated hubby's urgent requests for deodorant at the very last min.. eg: I need it now as I've just finished my can.
I will be adding labels to the front of each container but for now at least it is organised.  And so there we have it... I was done! A quick, simple organisation task that I achieved during kiddo nap time. I can tick it off my to do list and it made me so much happier that I could see I had achieved something for the day. I'm even happier to report that it still looks as neat and tidy a week on.... YAY!!


En suit organised.. tick! Now back to the on going Laundry I go...


YKylie

Wednesday, 30 May 2012

Our Boys Bedroom Redo

Having been inspired by so many of the wonderful bloggers I follow I finally decided it as time to reorganise our little mans bedroom. Where to start is always my problem however this time around I started with a list. A list of items that I would need to buy in order to achieve an eye pleasing room. I had been taking mental notes from the wonderful Jade at Super Organised Mum for quite some time as I had drooled over her kids rooms and so the list was relatively easy. It was just a matter of slowly gathering all the supplies needed.. a trip to the beloved stores such as Target, Ikea and Spotlight would fix this.

And so I started... and I remembered to take a before pic for you all to see this time :0)

First I cleared out all the toys... and boy does our little man have a truck load of toys! Especially soft toys. So out came the 'To Charity' box and with the approach of one stays and one goes the toys were decluttered.


Next I rearranged the furniture and just by doing that I was so pleased at how better this space already looked.
*I have plans to update the old set of draws seen here but that's another project for another time!

The next task was to hit the wardrobe. I went through all LJ's cloths and got rid of anything that does not fit or he simply does not wear. I printed off labels as to the order the clothes were to go back (idea from Jade) and am hoping this will also help hubby stay on the same page as me.


On the RHS of the wardrobe we have our space for hanging. I'm a big fan of hanging up as many cloths as possible thus reducing my time on folding washing. However in saying this due to limited hanging space there are some things that I can not hang and these have been placed in the hanging storage.
RHS of Wardrobe
Now I had searched for some hanging storage for quiet some time and think hubby became a little tired of me winging about not being able to purchase white hanging storage at a reasonable price.. lol poor hubby. Finally I came across blue and white hanging storage at my local $2 shop and so I decided they were eye pleasing enough to be used ;0) I purchased a matching set one for clothing and one for shoes. Such items as spare coat hangers, singlet tops, shorts, pj's, swimming gear and dressing gown are all stored here. I also used labelled on each shelf here so things go back where they belong.


Below the hanging space is where we will keep our little mans toys. All sorted for one box each day to come out and be played with and put away. (I'll go into detail in a later post to show you what I've done there).

Next out came the Ikea boxes to be put together. They fit perfectly in our built in shelving and are so easy to put together. In them I have stored (from bottom to top) a.Cloths to grow in to, b. Books and c.Memorabilia. With the top shelf being our nappy changing station consisting of our B-Box that holds a few nappies, wipes and disposable bags. I also have cream and antibacterial gel in the little blue box next to the b-box, well up high out of little fingers reach.

LHS of Wardrobe
Now all that was let to do was the fun part... sprucing up the room with some deco items. YAY.. my favourite bit!

First up went the wonderful Ikea hanging tube and in went all LJ's soft toys. Next I up went the white box shelving that I purchased from Kmart. To these I added some of our precious soft toys and accessories.

To finish off the wall I popped up some pictures I purchased off eBay


Below I added a little reading nook where LJ can sit on his Caterpillar pillow pet and read some books

And there we have it.. LJ's room is done

And I must say I'm very happy with what I've done!
YKylie

Tuesday, 15 May 2012

Getting ready for our girl

As baby #2’s arrival is fast approaching I decided to get organised and this meant one thing a complete overhaul of the master bedroom. 

Yes we live in a three bedroom home: Master bedroom, Bedroom 2 is our 22 month old boy’s room and Bedroom 3 is our very embarrassing chuck and shut room. And by embarrassing I mean I cannot even walk into the room! Hence bedroom 3 is just not a possibility for our new bundle of joy and as there are no plans of moving house at this point in time so our little girl will be joining us in our master quarters at least for now.

I always find it so hard to know where to begin and so put off a lot of to do’s for that very reason however this is just something that I have to get done. So why not start with the fun part of setting up bubs crib and getting inspired then to do more.
So I searched eBay and bought this gorgeous crib for a bargain of $25. It worked as soon as bubs crib went up I could not resist I had to do more.


So some shopping was in order and off to our wonderful local Target store I went to pick up some new bedding. Whilst I was there I found some fantastic white baskets on sale. So into the trolley they also went. Once back at home I just had to set up the change table next (this one we already had from bubs #1).

I find change table mat covers so expensive for what they are so instead I use cheep fitted crib sheet. On the first row I placed 3 of the target baskets. The first is holding towel nappies (revamped into cute burp cloths – post to come), with the other two baskets are holding the small cloths items such as socks, singlets, bibs and booties. I placed our blankets and wraps on the bottom of the change table so they are easily accessible.
I then had to find somewhere for all the baby cloths we had been given and so an overhaul of our wardrobe was in order. (I forgot the before pic..ops). I started by going through all me cloths and to my surprise I was able to give away a lot of items, 2 garbage bags full that I no longer wore or had outgrown. Having kids does this to you I guess.. lol
Organisation then began...


I moved all of our cloths to the back wall in the wardrobe as having bubs cloths closest to the door would work for me best. I put an old coffee table that we were no longer using below our cloths to gain shelf space for our jumpers and shoes. At the top of the wardrobe I put my shoes into shoe boxes and stacked on top. I then have my jewellery box, perfume box and hair accessories bag stored in there as our en suite is quite small. The large pink suitcase stores my wedding dress, I know I should get it stored properly its on my to do list when money allows. The green bag holds hubby's toys, his remote control car, helicopter and tank – don’t ask!


The right of the wardrobe is where I had cleared all the space for bubs cloths along with my maternity clothes for now.  At the top I have used IKEA DRONA boxes to store all the larger cloths for her to grow into.

As these box will be constantly changing I thought of re using some size labels of cloths instead of printing labels.

I like to hand up all our cloths as this reduces my work load by not having to fold cloths to put away. I simply just hang them up and this also allows me to see everything at a quick glance. As our little miss already has SO many cloths I was in need of more hanging space. So making do with what I had laying around I grabbed some twine and a rod and made a quick second rail. Under all her cloths I will store the baby car capsule when not in use.


I will be adding some gorgeous cloth divides but for now I’m happy with what I’ve done. And so there we have it I’m all set for our little girl’s arrival in July.
YKylie